Classroom log cabin
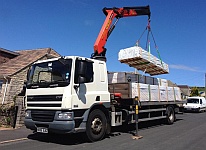
Our log cabin installation for this month is for Elizabeth Selby School in Tower Hamlets just off Bethnal Green Road. Quite a journey getting into Central London and quite a project too!
We were first approached with a request for a log cabin to maximise the space available. They had very specific ideas about the size and needed two classroom spaces which had their own external doors and one partition door. Having found there was not an ideal solution amongst our standard range we suggested the option of a bespoke cabin to match their precise specification.
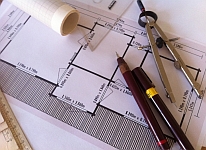
Following a consultation process we agreed the final design and production began. Here is an initial sketch of the design used in the preliminary stages.
Below is an example of one of the CAD drawings we submitted to our client for approval prior to manufacture.
And below we have the images of the installation process.
Having completed the concrete base for the log cabin the previous week we were ready to start the assembly.
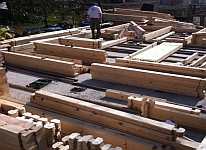
The first task is to organise the timbers and work with the plans to get the basic framework underway.
Many of the timbers in this log cabin were in excess of 8 metres. This is a two and sometimes three person job.
Door frames go in before the walls get too high and similarly windows after two or three wall timbers are in place either side.
Standard wall thickness on our bespoke log cabins is 44mm with double glazed windows and doors. Doors are triple hinged and can be adjusted very easily in three different planes. As well as 44mm walls we can also offer 70mm or dual walled log cabins 44+50+44mm with a cavity suitable for 50mm wall insulation such as Kingspan insulation or Celotex.
Up to roof height and just about to line up the roof joists before fixing them down. They are not lined up yet! A roof of ths size and type is quite different to the standard cabin roofs used in most pre-manufactured kits which tend to slot together very easily. This particular roof was a bit more time consuming.
Finally topped out with tongue and groove we can now make a start on tiling the roof. As standard we use bitumen roof shingles which we find produce a very attractive finish at a reasonable cost.
Roof tiles on and it is time to lay the floorboards and prepare to insulate the interior. We will be using Celotex insulation for the floor followed by 18mm plywood prior to the final floor covering. The roof is insulated with rock wool slabs and has plasterboard suspended between the roof joists. Wall insulation is another option either by drylining the interior or by building a log cabin with twin walls and a cavity.
A view of the interior as the cabin nears completion.
Insulated roof plasterboarded and painted.
Unique to this cabin we fitted an access panel so that a drain cover could be accessed if required. This involved creating a frame around the manhole cover during the base construction and then creating a frame in the floor to accommodate the insualtion. Finally an access panel was fitted with a recessed handle.
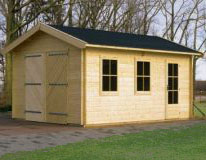
The finished product. 8 metres x 4 metres of additional classroom space with an internal partition and two access doors.
The exterior is painted with Osmo wood stain and protector. We normally apply two coats to provide a more even finish and several years of protection. In this case the shade red cedar was used which ties in well with the Victorian brickwork behind.
We hope the classroom cabin is a fun learning space for all who use it.
Log Cabin Installations by Cabin living
Further details:
- Bannockburn log cabin (Addlestone, Surrey)
- Cheltenham log cabin (Wimbledon, London)
- Classroom log cabin (Bethnal Green, London)
- Devon log cabin (Blackpool, Lancashire)
- Helsinki log cabin (Thame, Oxfordshire)
- Liverpool log cabin (Oxford, Oxfordshire)
- 2.5m High - 5m x 5m Liverpool log cabin (Leighton Buzzard, Bedfordshire)
- Bespoke Sized Liverpool log cabin (Cambridge, Cambridgehsire)
- Bespoke Liverpool Garden Office (Lymington, Hampshire)
- Luton log cabin (Bangor, Gwynedd)
- Manchester log cabin (Southport, Merseyside)
- Norfolk log cabin (Strathaven, South Lanarkshire)
- Residential log cabin (Llandysul)
- School log cabin (Great Malvern, Worcestershire)
- Talo log cabin (Muswell Hill, London)
- Thirsk log cabin (Leuchars, Fife)
- Winchester log cabin (Iver Heath, Buckinghamshire)
- 2.5m high Cheltenham log cabin (Surbiton, London)
- Cheltenham log cabin (Dollar, Perthshire)
- 2.5m high Berwick log cabin (Tadworth, Surrey)
- 2.5m High - 4m x 3m Liverpool log cabin (Stourbridge, West Midlands)
- 2.5m High - 4m x 3m Liverpool log cabin (Bingley, West Yorkshire)
- Bespoke Garden Workshop (Warminster, Wiltshire)
- Bespoke Marlborough log cabin 70mm (Shifnal, Shropshire)
- Denham Waterski Boathouse (Denham, Buckinghamshire)
- Alex Garden Office (Lidlington, Bedfordshire)
- Alex Log Cabin 3m x 2.5m (Newport Pagnell, Bedfordshire)
- Barbados 3 UK installation (Wootton, Bedfordshire)
- Lowered Liverpool Log Cabin 4m x 4m (Ottery St. Mary, Devon)
- Java Garden Office (Southgate, North London)
- Bermuda log cabin (Sudbury, Suffolk)

